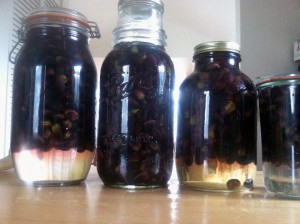
We have a bumper crop of olives this year and want to share the bounty from the trees with you. Embark on an experimental journey with us, which will yield your very own cured olives.
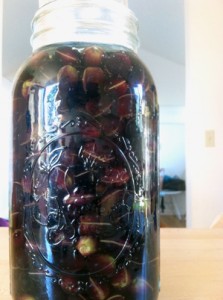
The olives you are receiving in your box this week are straight from the tree and not suitable for eating. Raw olives are extremely bitter and contain the compound oleuropein. In order to be eaten, they must be cured in order to reduce the amount of oleauropein present in the fruit.
There are several different methods of curing olives and we’ve opted to try the two that seem the most user friendly – water curing and brine curing. How long will it take? According to our research (experimenting in the kitchen this weekend), based on the amount of olives you are receiving (1 lb), the initial process will only take about 45 minutes to an hour, but the olives will take anywhere from 1-3 months to cure. Don’t worry, when they are curing, they require minimal attention and time!
For both recipes follow the preparatory steps below:
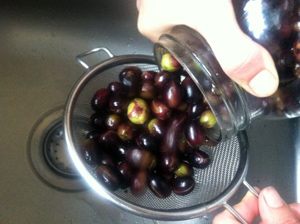
Remove any leaves from the olives you find. The farm is dusty this time of year so you may want to rinse them in a large basin of water to remove the dust. Some people prefer not to rinse their olives when using the brine cure because of the naturally occurring yeast that is present on the skin, which aids in the fermentation process. I opted to rinse mine because they were really dusty.
Sort your olives to remove any that are unsuitable for curing before preparing them for the water or brine. You can do this ahead of time or just sort them as you go along. We opted to sort as we went along. Olives for curing should have no visible damage on the skin, aside from tiny spottings.
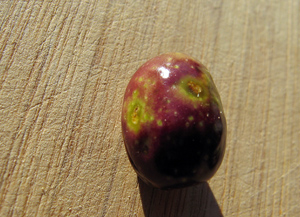
A round beige scar as shown to the left indicates an olive fly larvae burrowed into the olive, these should be discarded. Any olives you find with brown softened spots on the skin should also be discarded. You want firm olives with smooth skin.
For both methods, here are the supplies you will need:
-
A little time
Some good music (optional)
Spouse, child, or friend to chat with, or an appreciation of getting some solitary meditative time
Your favorite beverage (optional)
A stockpot or large bowl half full of cool water
Containers in which to cure the olives (wide mouth glass canning jars work well and are easy to find)
A sharp paring knife
In order to allow the oleuropein to leach out, you must cut the skin of the olive. Using a sharp paring knife, cut an incision in the skin of the olive lengthwise, being careful not to press too hard on the pit. I cut an incision on both sides to allow for maximum leaching and faster curing. You could opt not to cut the olives at all, but you’d likely be curing them for about a year.
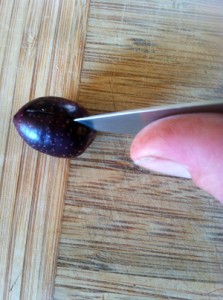
Once you’ve cut the olive, place it in to a basin of cool water to prevent discoloration of the olive due to oxidation.
For the water cure method, once you’ve cut all the olives, place the olives in the jar you will use to cure them, and cover them with water. You will need to keep the olives submerged to avoid oxidation and so they can leach properly. I’ve found that an empty and clean FHF conserve jar works perfectly as a weight with wide mouth canning jars, but you could also use a small bowl, cheesecloth, or even a food grade plastic bag filled with water.
You will then need to change the water once a day, more if the water becomes cloudy and dark. The water should be changed for anywhere from between 14-30 days. You can test the olives as they go for readiness. After 14 days, try one. If they are still horribly bitter, continue to let them leach in the water. Your olives will be firmer if you keep them in the fridge. If you opt not to place them in a fridge, keep them in a cool dark place.
After the water process, the olives are ready to be moved into a brine solution. To prepare the brine solution, dissolve ¼ cup of kosher salt into 4 cups of cool water. Add ½ cup cider, white wine, or plain white vinegar. You can add anything you like to flavor the olives. Bay leaves and coriander are highly recommended. To those you could add citrus peels, chili peppers, black peppercorns, or your favorite herb. Go lightly though, so your olives will taste like olives.
Drain the olives from the water and place them into clean jars. Pour the brine over the olives to cover and then pour about ¼ inch of olive oil on top. Seal the container with a lid and allow to marinate in a dark place between 60-80 degrees Fahrenheit until desired flavor is reached, between 2 weeks to a month.
Olives cured in this method can be stored for up to a year in the fridge or in a cook dark place if the container remains tightly sealed.
For the salt brine curing method you will need
-
a pot for heating water
kosher or pickling salt
a raw egg in its shell
glass jars with tight fitting non corroding-lids
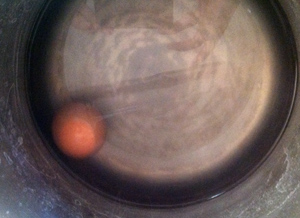
To prepare the brine, start with 2 quarts of water and add 1 cup of salt. Dissolve the salt. Once the salt dissolves, place a raw egg in its shell into the pot. If the egg floats, you know your brine is strong enough. If not, add more salt until your egg floats. Allow the bring to cool.
Prepare the olives as explained above for the water curing method by slicing the skin with a paring knife. You can either place olives directly into the container you will cure them and then pour the brine on top, or place them into a bowl of cool water until you are done slicing the skin, then drain and pour into the container of your choice and pour over the brine. The olives should be completely submerged in the brine to prevent spoilage. Expect to see olives floating above the bottom of your container. The salty environment will cause them to float. Close the container and set it aside in a cool dark place. You may want to turn the olives every day for the first few days to make sure they are all covered. After seven days, prepare a new brine and replace.
You should check your containers pretty often. The fermentation process may cause gas pressure to build up and your lids may bulge. To release the pressure, carefully loosen the lids and then close them firmly again once pressure has been let out.
Allow your olives to ferment for at least a month and then test them periodically. When you find they have mellowed to your liking, enjoy them. These cured olives can be stored for about a year if the lids to the jars are sealed airtight. Or store them in the fridge.
If you find your olives are too salty but not bitter, you can soak them in water over night before eating them. After soaking them in water you can store them in a little olive oil in the fridge before enjoying them.

 Follow

